Last time we created some Cloud layers with random noise and patterns. This time we will use these patterns to create texture and terrain features. As with the previous post, we are just going to mostly duplicate the steps in Arsheeh's Eriond Tutorial for GIMP and Wilbur that was found at the cartographers guild. (Credits for this goes to him.) Note that as we progress, it's a good idea to make backup copies of layers before you change them. This way you have something to go back to if you make a mistake.
Isolating the Land
The next step is to mask out the Land Clouds with our Land Mask channel. This will restrict the clouds layer to only the areas of your map which are land. The rest of the areas will become transparent. Create a new black layer (set the fill type to Foreground Color and make sure your foreground color is set to Black) named “Land” and move it to just below the Land Clouds layer. This Land layer is really just a flat black background under your Land. Next, un-hide the Land Clouds layer and then right click on it to add your Land Mask.
Layer > New Layer > Black (Name “Land”)
Layer (Land) > Lower Layer (to just below “Land Clouds” layer)
Layer (Land Clouds)> Unhide
Right Click on Land Clouds layer > Add Layer Mask > Channel (Land Mask)
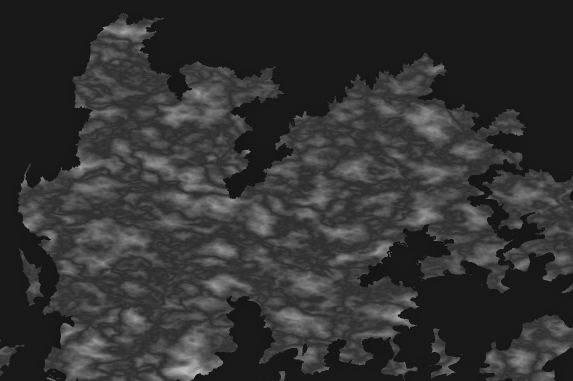 |
| Land Clouds Layer |
Now your land should be isolated. However, the Land Clouds patters have far too much contrast. Let’s go ahead and change that but before we do, make a backup copy of your layer by duplicating it and then hiding the duplicate. Make sure that the Land Clouds layer is active by clicking on it (and not the layer mask to the right of it,) then go to Colors and select Brightness-Contrast. Set the Contrast to -25. If you find that your map is too dark, you can adjust the brightness slightly as well (maybe to +10.)
Colors > Brightness-Contrast > Contrast -25
The result should look like the map at the right "Land Clouds Layer."
No comments:
Post a Comment