Showing posts with label Map Making. Show all posts

Wednesday, 25 February 2015

Redesigning the Setting: Drawing the Satellite View Map, 7

Last time we created some Cloud layers with random noise and patterns. This time we will use these patterns to create texture and terrain features. As with the previous post, we are just going to mostly duplicate the steps in Arsheeh's Eriond Tutorial for GIMP and Wilbur that was found at the cartographers guild. (Credits for this goes to him.) Note that as we progress, it's a good idea to make backup copies of layers before you change them. This way you have something to go back to if you make a mistake.

Isolating the Land

The next step is to mask out the Land Clouds with our Land Mask channel. This will restrict the clouds layer to only the areas of your map which are land. The rest of the areas will become transparent. Create a new black layer (set the fill type to Foreground Color and make sure your foreground color is set to Black) named “Land” and move it to just below the Land Clouds layer. This Land layer is really just a flat black background under your Land. Next, un-hide the Land Clouds layer and then right click on it to add your Land Mask.

Layer > New Layer > Black (Name “Land”)
Layer (Land) > Lower Layer (to just below “Land Clouds” layer)
Layer (Land Clouds)> Unhide
Right Click on Land Clouds layer > Add Layer Mask > Channel (Land Mask)
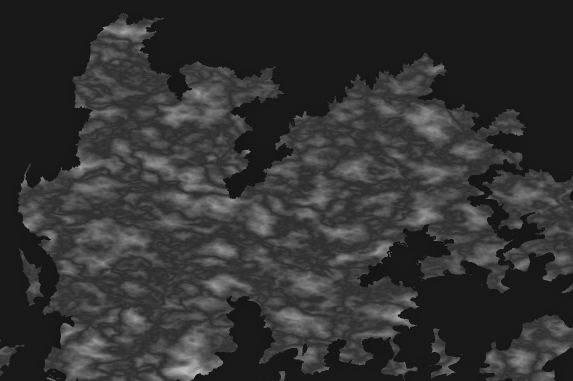
Land Clouds Layer

Now your land should be isolated. However, the Land Clouds patters have far too much contrast. Let’s go ahead and change that but before we do, make a backup copy of your layer by duplicating it and then hiding the duplicate. Make sure that the Land Clouds layer is active by clicking on it (and not the layer mask to the right of it,) then go to Colors and select Brightness-Contrast. Set the Contrast to -25. If you find that your map is too dark, you can adjust the brightness slightly as well (maybe to +10.)

Colors > Brightness-Contrast > Contrast -25

The result should look like the map at the right "Land Clouds Layer."


Monday, 23 February 2015

Redesigning the Setting: Drawing the Satellite View Map, 6

Creating the Land Height Map 

Creating the height map is probably the most important step for creating the map. This is what will give depth and height to your map and make the different geographical features identifiable. We are going to ultimately create 2 height maps, one for the land and one for the sea. This post concentrates on the Sea. By and large we are just going to duplicate the steps in Arsheeh's Eriond Tutorial for GIMP and Wilbur that was found at the cartographers guild. (Credits for this goes to him.)

Generating Clouds & Random Shapes

Create a new white layer above your outline and name it “Clouds 1”.
Layers > New Layer > White (Name "Clouds 1")

On that layer render a set of Difference Clouds. Set the Detail to 15 and (assuming a 3400x1700px size) the X and Y Size to 16.
Filter > Render > Clouds > Difference Clouds > Detail 15 ; Size 16
Create a new layer above Clouds 1 and repeat this step, only this time use a different seed for the Clouds. Name the new layer “Clouds 2”. Set the layer mode of Clouds 2 to Difference.
Layer > New Layer > White (Name Clouds 2) > Layer Mode (Difference)
Filter > Render > Clouds > Difference Clouds > Detail 15 ; Size 16

Right Click on Clouds 2 layer and select New From Visible and name the new layer "Difference 1"
Right Click on Clouds 2 > New From Visible (Name Difference 1)

Repeat this process. Create a “Clouds 3” and a “Clouds 4” layer (above the Difference Clouds 1 layer). Set the opacity of Clouds 4 to Difference and then create a New from Visible layer named “Difference Clouds 2”.
Repeat the preceding steps to make Difference 2

Next move the Difference 1 layer up in the dialogue to just below Difference 2.
Layer (Difference 1) > Raise layer (to just below Difference 2)

Land Clouds

Now set the layer opacity of the Difference 2 layer to Difference and then create a New from Visible layer right above it named “Land Clouds”. As the name implies, this layer will serve as the base clouds layer for our map. The picture captioned 'Land Clouds' should give you an example of what this looks like so far.

Layer (Difference 2) > Layer Mode (Difference)

Layer (Difference 2) > New from visible (Name Land Clouds)

Next we are going to generate cloud patterns to be used for mountains. To do so, follow the instructions given below. This should give you a set of clouds similar to that of the picture captioned 'Mountain Clouds'
Mountain Clouds
Layer (Land Clouds) > Hide Layer

Layer (Difference Clouds 2) > Layer Mode (Addition)

Right Click on Difference Clouds 2 > New From Visible (Name Mt. Clouds)

Colors > Invert. Set Layer opacity to 90%

Now that we have our cloud patterns we will isolate the Land Clouds with the map outline channel; but we'll deal with that in a future post.

Sunday, 25 January 2015

Redesigning the Setting: Drawing the Satellite View Map, 5

Continuing in the series we are going to start with creating some very important masks.

Creating the Land and Sea Masks

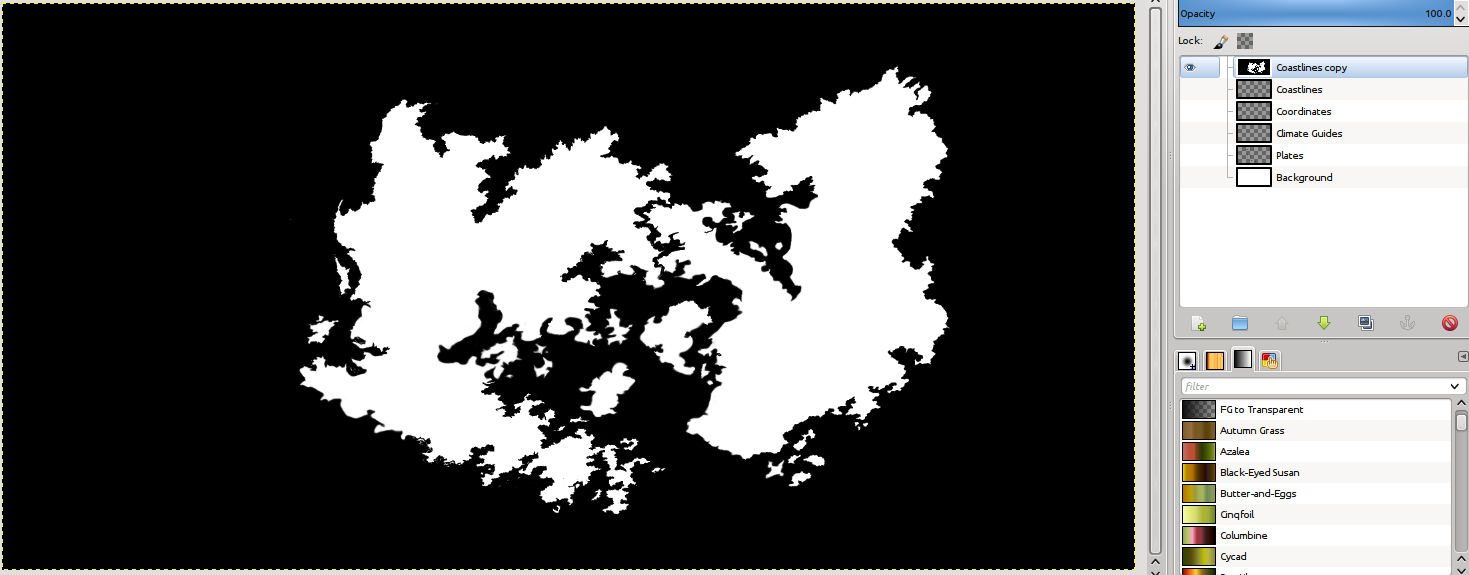
Before we modify anything let's create a backup of our Coastlines layer by duplicating it and naming the copy "Map Outline." Then toggle the visibility of the Coastlines layer so that it is not seen.
Layers (Coastlines) > Duplicate Layer (Name "Map Outline")
Layers (Coastlines) > Hide

On the "Map Outline" layer we are going to fill the land in with white and the seas in with black. Ensure that the "Map Outline" layer is active and take your bucket fill tool and fill in the land and seas. 
Bucket Fill (Black) > Click on the area outside of the land
Bucket Fill (White) > Click on the land 

Ensure that you have clean black and white boundaries before moving on (i.e. the land and sea should be flat white and black around the borders, no grey or shading.) Now, let's create the masks. On the "Map Outline" layer, select the Select by Color tool (Threshold 0) and click on the land (white) area.
Layer (Map Outline) > Select by Color (Threshold 0) > Click on Land

Now go to the Select menu tab and click on Save to Channel; name this channel “Land Mask”.
Select > Save to Channel (Name Land Mask)

We are going to repeat this process for the sea. On the "Map Outline" layer, select the Select by Color tool (Threshold 0) and click on the sea (black) area.
Layer (Map Outline) > Select by Color (Threshold 0) > Click on the Sea

Now go to the Select menu tab and click on Save to Channel; name this channel “Sea Mask”.
Select > Save to Channel (Name Sea Mask)

That is for today, next time we'll continue with beginning to create the Height Map.

Friday, 23 January 2015

Redesigning the Setting: Drawing the Satellite View Map, 4

Now that we know about winds, climate zones and tectonic plates we are ready to draw the outline of our map. I prefer to draw the map with some markers for latitude and longitude so that I know what the climate will be in those areas. To do this, add a layer called coordinates
Layer > New Layer > Transparency (Name Coordinates)
Pencil > Brush (2. Hardness 100) > Colour Black

Now, using the Gimp guidelines, rules and a pencil tool draw the latitude and longitude lines at regularly spaced intervals. If you want, you can get fancy and label them. See how I've done set this up below:
Images in construction with Longitude and Latitude lines
One you've drawn your lines to reference Longitude and Latitude you can remove the blue guidelines. Now, add a new transparent layer named Coastlines and put just under the Coordinates layer. Generally we will keep the Coordinates layer at the top of our layer stack.
Layer > New Layer > Transparency (Name Coastlines)
Pencil > Brush (2. Hardness 100) > Colour Black

Now, using what you've learned, with the Coastlines layer selected, draw your continents and coastlines. You can see my completed coastline layer below.

Coastlines completed

Tuesday, 20 January 2015

Redesigning the Setting: Drawing the Satellite View Map, 3

Last time we ended with a GIMP drawing with a transparent layer for your plates. I was going to skip right to drawing the outline of the continents until I realized that I was missing a step and that is understanding where the general climate zones will be. Both together are important and here's why:
Subduction Zone - Rocky Mountains

  • On coastlines where you have mountains near the water, those coast lines will tend to be more jagged especially the closer you get to the poles.) That said, even when you have mountains running parallel to a coast line you could still have smooth sections of coast line. This is because where 2 plates collide and form mountains will not always be right at the edge of the water. A subduction zone will often start out a distance at sea and the lighter rock of the continent will stay above it. See the image to the right.
  • In the areas where you have deserts meeting coastal areas, tropical beaches, etc. you will likely have smoother coastlines due to long stretches of sand. This isn't always true of course but it's a good rule of thumb. That means you need to understand, generally where these areas will be on you map. 
The earth has a number of climate zones that correspond roughly to specific latitudes. Whether they are damp or dry will also depend on the atmospheric geography of those areas. See the image to the right. You'll notice correspondences between damp tropical regions and desert regions because of where the winds are carrying moisture and dropping it. Reference the diagram below. You'll see the directions of the winds and the high and low pressure zones. At HIGH pressure zones you have dry air that has cooled falling back down to the surface. Because it has little to no moisture the areas where this air falls are likely to be dry. As the air moves across land and water it will become more humid, carrying more water vapour. It will eventually lose that moisture as rain or fog when it cools and looses its ability to carry that water vapour. It will cool when it gets forced to a higher elevation by a land formation such as a mountain or at a LOW pressure zone or when it meets a cool body of air. This diagram will also help you understand the wind patterns and how maritime peoples on your continent might get around by ship (i.e. where your tradewinds will be.)
The last item you need to be aware of is the heating of the earth due to the Sun, it is the combination of the heating of the atmosphere and spin and tilt of the earth that drives the climate. So, as you draw your coast lines, you'll want to have a general idea of which latitudes your continent span and what the climate is like around those areas. What I did was to add some drawings like these as layers to my image and set the opacity low as I was drawing my coastline so that I had a reference point. We'll talk more about that in the next post.

Friday, 16 January 2015

Redesigning the Setting: Drawing the Satellite View Map, 2

Creating your Map, Preliminary 

Ok, lets get to work. Fire up the Gimp and open a new image. I recommend that you start with a map that has dimensions that are a 2:1 ratio (twice as wide as it is high) and is in landscape mode. (My map is 3400 × 1700 at 300dpi). If you go much larger than that you will have to play with the settings as we go along.


Notes on larger maps

When it comes to using Wilbur, you'll need the 64-bit version if you have a map with a resolution larger than what I'm using. Also, be aware that maps at higher sizes and resolutions are a lot larger and require faster computers with more RAM. I didn't have any issues on my computer (I have an i7 Haswell with 16GB of RAM.)

This should be what you see with your default image (an image with one single layer that is White.)
New Gimp Image

Conventions

As we go along I'm going to follow Arsheesh's convention of offering explanatory text describing our actions followed by a highlighted summary of specific actions we will be taking. So, if I say that we are going to create a new Layer that is filled with White and name it 'Background' you'll see it presented like this:
Layer > New Layer > While (Name Background)

Bringing in the Plates

If you haven't already, you are going to want to create a new transparent layer named "Plates" and either bring in the plates you draw in our earlier blog post or draw them quickly here with a Pencil tool.

Layer > New Layer > Transparency (Name Plates)
Pencil > Brush (2. Hardness 100) > Colour Black

Now draw your plates with the plate boundaries. Mark which types of boundaries those are, remembering that if you have a spreading center on one side that the opposite side will be a converging boundary that is pushing into another plate. A screenshot of my basic plates (I was only drawing the region around my continents and not the entire planet) is below.

Plates

Thursday, 15 January 2015

Redesigning the Setting: Drawing the Satellite View Map

Apparently, according to my wife, my posts are way too long. So I'm going to break things down into smaller bite sized pieces. Before I do that, I want to thank the folks over at The Cartographers Guild for their all of their help and assistance.

This effort is going to span multiple posts and in constructing our map we are going to use The Gimp and the Wilbur mapping tool. If you want to follow along I'm going to try this tutorial style so go ahead and get those tools installed. Also, you will need the following Gradients installed.

I generally followed a tutorial from a Arsheesh on the guild website called Eriond - A Tutorial for GIMP and Wilbur to create a satellite view style map, but I made a fair number of modifications. I'm going to follow his pdf in style and convention.

But that's all for today, don't want to make these posts too long! Come and see us again tomorrow for more!